MsMpEng.exe can cause high CPU usage on Windows 10 and make your PC nearly unusable. Msmpeng.exe, also known as Antimalware service executable, is a relevant and effective program that protects your computer from threats but sometimes it starts utilizing 100% of CPU and Disk. Whenever this happens, your system becomes slow or even stops working completely. Therefore, if it is consuming your available CPU, it is better to disable it. In this article, I will share 7 different solutions to fix the high disk and CPU usage issue caused by MxMpEng.exe. So, let’s get started! Also, Read: How To Fix System Thread Exception Not Handled Error?
Solutions to Fix MsMpEng.exe High CPU and Disk Usage Issue
Solution 1: Reschedule Windows Defender
During a full system scan, Windows Defender can use a lot of CPU power. Users only need to wait until the system scan is complete (for their own safety). A full scan is needed from time to time, so users should run it periodically. In some cases, it is incorrectly set to run daily, increasing the CPU usage. Because of this, users assume that Windows Defender consumes way too much CPU power in general. By following the steps below, you can reschedule Windows Defender to fix this problem. Step 1: Press Win + R, type taskscd.msc, and then click OK. Step 2: Go to the Task Scheduler Library > Microsoft > Windows > Windows Defender directory. Step 3: Locate and right-click the Windows Defender Scheduled Scan and select Properties. Step 4: Select Properties and click on Conditions. Step 5: Uncheck all conditions and click OK. Step 6: Next, reschedule Windows Defender. Go to Properties and click the Triggers tab. Step 7: Click on the New button. Step 8: Select the Monthly or Weekly option. Step 9: Now select the preferred Day and enable it. Step 10: Click OK, and then close all windows.
Solution 2: Prevent Windows Defender From Scanning Its Directory
Step 1: Press the Windows key and then type Windows Defender settings. Step 2: Double-click on the option to open its settings. Step 3: Select Open Windows Defender Security Center. Step 4: Go to Virus & Threat protection -> Virus & Threat protection settings. Step 5: Locate Exclusions and click on Add or remove exclusions. Step 6: Click on Add an exclusion and then Exclude a folder. Step 7: Copy and paste the c:\program files\windows defender path.
Solution 3: Limit CPU Usage
Step 1: Right-click the Start button and select Task Manager (or press Ctrl + Shift + ESC). Step 2: Now click on the Details tab. Step 3: Right-click msmpeng.exe, then select Set affinity. Step 4: Select which cores you want to use for the particular process. When you perform the steps above, you will limit the amount of processing power that is allocated to the process, so you won’t have to worry about high CPU usage.
Solution 4: Start Windows In Safe Mode
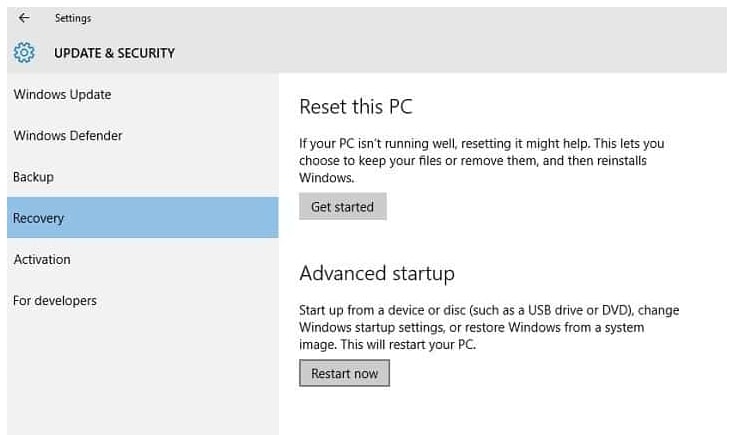
In Windows operating systems, the Safe Mode provides limited access to Windows when the operating system is unable to start or doesn’t work properly. When Windows starts in safe mode, it uses a small set of files and drivers. This can help troubleshoot computer problems. As a result, you should start your computer in Safe Mode, and scan it with a third-party antivirus program, or you should run Microsoft Defender repeatedly. You can reach Safe Mode by following these steps: Step 1: Right-click on the Start button and then select Settings. Step 2: Go to Update & Security, click Recovery. Step 3: Click Restart now under the Advanced startup section (the computer will restart immediately). Step 4: Select an option from the menu after restarting your computer. Step 5: Go to Troubleshoot > Advanced options > Startup Settings and click Restart. Step 6: To enter Safe Mode with Networking, press F5 or 5. Step 7: Use an anti-malware program to run a full system scan.
Solution 5: Disable Sample Submission
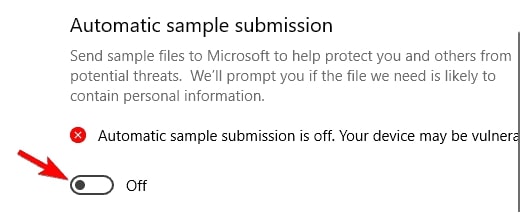
Some users have experienced high memory and CPU usage problems when using msmpeng.exe as a result of the Sample Submission feature. By using this feature, problematic files are sent to Microsoft for analysis. while this is a useful feature but can create problems as well. By following the steps below, you can fix this problem: Step 1: Open Settings and select Updates and Security. Step 2: Click on Open Windows Security in the Windows Security menu on the left. Step 3: Next, click on Virus & threat protection. Step 4: Then under Virus & Threat Protection settings, click Manage settings. Step 5: Navigate Automatic sample submission and turn it off. Once you’ve done that, check if the problem has been resolved. If not, try another solution.
Solution 6: Disable Windows Defender Using Group Policy Editor
Step 1: To start, press Windows Key + R and type gpedit.msc then press Enter. Step 2: Group Policy Editor will now open (This feature is only available on Windows Pro and Enterprise versions). Step 3: Go to the left pane, and select Computer Configuration, then click on Administrative Templates, Windows Components, and Windows Defender Antivirus. Step 4: Double-click on Turn off Windows Defender Antivirus in the right pane. Step 5: In the Properties window, select Enabled and click Apply and OK. You cannot use the Group Policy Editor if you have a Home version of Windows. However, you can install it at any time.
Solution 7: Uninstall The Most Recent Windows Updates
In some cases, Windows updates do not install properly, resulting in certain system functions malfunctioning, such as Antimalware Service. If this occurs, uninstall the most recent Windows updates, then update the system again: Step 1: Right-click on Start and select Settings. Step 2: Go to Updates and Security and then click on View update history (right menu) Step 3: Choose Uninstall updates. Step 4: Ensure the updates are sorted by the installation date. Step 5: Right-click on the most recent Windows updates and choose Uninstall. Step 6: Reboot your computer and initiate Windows updates via Settings.
Conclusion – MsMpEng.exe High CPU and Disk Usage
As you can see above, I have described 7 effective solutions to fix MsMpEng.exe High CPU and Disk Usage issue. And I hope you find these solutions helpful. If MsMpEng.exe is consuming a large number of CPU resources, then do not sit idly, fix it by using the above solutions and reduce the extra load on CPU and disk. Let me know if you have any questions or suggestions in the comment section below. Thanks for reading this article. Also, Read: How to Fix Runtime Broker High Usage on Windows 10